Presenting a fresh article on Setup Free Cloudflare SSL for WordPress. Recently Google announced, the websites or blog to have their SSL certificate. It is compulsory from January 2017 and also it is very beneficial. Good companies like CloudFlare are giving SSL for free.
Currently, Google is taking steps for moving towards a more secure web. Recently I also switch my blog from HTTP to HTTPS. If you don’t have SSL on your blog then Google will show a warning to visitors that “The website or blog is not Secure“.
Recently I also install SSL on my blog and got many different types of problems. But it will not be going to happen with you because I am here to guide you. It is very simple to setup SSL on WordPress. All you need to do some changes in DNS and need to install two plugins.

How To Setup Free Cloudflare SSL
- Let’s begin with CloudFlare.
- First of all, create a new account on CloudFlare by clicking here.
- Now, add your website to CloudFlare.
- The scan will begin, it will take 1 minute then click on continue setup.
- Now, it automatically adds DNS records of your domain and then clicks on continue.
- Select free plan of CloudFlare and click on continue.
- It will display two nameservers which we need to update in the domain.

- Next, click on continue button.
Update Nameservers on Godaddy
- First of all, login to your GoDaddy account.
- Select the domain and then manage DNS.
- Now, update your DNS nameservers to CloudFlare NameServers then click on save.

- Finally, the nameserver will update within 48 hours.
- After one hour you can check your nameserver are updated or not. You can check on Google by typing whois trypromocode.com
- Click on first result or any of your choice. There you can see your nameservers are updated or not.
- If your nameservers are updated then go to CloudFlare and click on recheck nameservers.
Configure CloudFlare Settings
- Now, go to Crypto then change SSL FULL to Flexible.

- Also, scroll down in Crypto and turn ON the Automatic HTTPS Rewrites.

- Go to Caching and change Purge Cache Individual to Purge Cache Everything.
- Go to Page Rules and create a new page rule.
- Now type this into text box http//*.yourdomain.com/* and pick setting “Always use HTTPS“.

- Finally, Click on Save and Deploy button.
Configure WordPress Setting
This two plugins will fix most of the problems occurs during setup SSL. It also fixes Mixed Content Warning or inSecure problem. After installing these two plugins, surely the green signal will show on your blog. So let’s start configuring WordPress.
- First of all, go to admin panel of your WordPress blog.
- Install two Plugins CloudFlare and Really Simple SSL then activate plugins.
- Go to settings then select CloudFlare.

- Enter the email address of your CloudFlare Account.

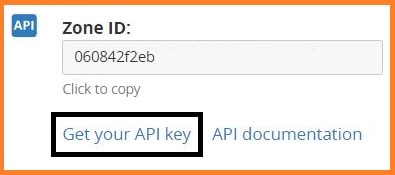
- Next, click on get your API key from here.
- Dialog box will appears then click on get your API key.

- Now, click on View API Key button of Global API Key.

- A dialog box appears with API key. Copy the key and paste it to CloudFlare API key on WordPress.
- Finally, click on Save API Credentials.
Recommended: DigitalOcean VPS Free Promo Code, Coupons
Now, you did everything for SSL on your blog. Open your blog in the new tab and check SECURE is showing or not.

If Secure is showing it means you perfectly install free CloudFlare SSL. Otherwise, you miss something to do. Also, I made a video tutorial for you. Check video tutorial for setup free CloudFlare SSL on WordPress.
You can comment below if you getting any Errors. Keep visiting TryPromoCode for more updates. Also, you can rate this post if you like it.


